Monday, February 28, 2011
Tuesday, February 1, 2011
Coolest Clock E-VER!
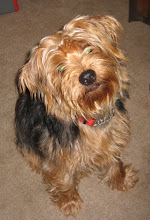
So, one of my besties had a birthday back at the beginning of December. We both love making stuff, so I thought to myself, "Self, why not give her something we can make together. Hmmm. . ." I had to think of something we could make. Ok, her bedroom is black, white, and pink. (Love that color scheme!) Her favorite things in the world are her four animals. She could use a great big clock b/c she's always late. (Heh. . . heh! Don't hit me, Sam! It hurts!) And the idea was born. . .
I designed the clock, and bought all the necessary parts. Except for the most important piece: the wood. My favorite daddy in the whole wide world gave me a piece. And cut it for me. Twice. But we won't go there right now. Here it is all finished. What do you think?

I decided to make each corner of the clock a corner for each of the animals. I put their names and a whole bunch of words describing each pet into Microsoft word, and played around with the fonts and text sizes. It only took 4 days! The girls are in opposite corners on two different pink papers, and the boys are in the other two corners on black and white papers. I printed the boys' names and descriptive words on pink card stock so it would stand out against the black and white paper. The girls' names and descriptive words were printed on white card stock. (I thought the pink would get lost on the pink paper. I would have liked to have done white font on black paper, but I wasn't sure how to do that.)
Here goes:

First, I asked my dad oh-so-sweetly to cut a piece of wood for me. He has a stash of 3/4 in. plywood that worked quite nicely for our purposes. He also drilled a hole for me. He's the best. He did it twice for me. I won't say why b/c it was my fault.
We primed the wooden letters (that we found at Hobby Lobby quite by accident), the board, and four wooden cabinet knobs that we used as feet on the back b/c the clock mechanism stands away from the board. We spray painted all the wooden parts a glossy black.


We spray painted the clock hands the Raspberry color. I'm not sure they stand out enough, so we might have to repaint them a glossy black, too.
Then we modpodged the four papers to the board. We used wood glue to glue the wooden letters in their places so we could get the words placed correctly around them. We modpodged the words after that.


We sealed all the words with a final coat of modpodge. After that was all done, all that was left was the feather boa and the clock hands and mechanism. We used Fabritac to adhere the feather boa around the clock. Lemme tell ya! Gluing a feather boa to something ain't easy! Sheesh. I hope I never have to do that again! We also used a staple gun on in. The clock hands and mechanism were easy. We used wood glue for the cabinet knobs/feet thingies (of which I do not have a picture).
It's pretty big. The board is 18" x 18", and the boa adds a few inches to either side. I think it's adorable, though!
I'm going to make myself one using the first board my dad cut for me. But much different. And without the boa.
I designed the clock, and bought all the necessary parts. Except for the most important piece: the wood. My favorite daddy in the whole wide world gave me a piece. And cut it for me. Twice. But we won't go there right now. Here it is all finished. What do you think?

(Honestly, I don't care what you think. I love it!) ;)
I decided to make each corner of the clock a corner for each of the animals. I put their names and a whole bunch of words describing each pet into Microsoft word, and played around with the fonts and text sizes. It only took 4 days! The girls are in opposite corners on two different pink papers, and the boys are in the other two corners on black and white papers. I printed the boys' names and descriptive words on pink card stock so it would stand out against the black and white paper. The girls' names and descriptive words were printed on white card stock. (I thought the pink would get lost on the pink paper. I would have liked to have done white font on black paper, but I wasn't sure how to do that.)
Here goes:

First, I asked my dad oh-so-sweetly to cut a piece of wood for me. He has a stash of 3/4 in. plywood that worked quite nicely for our purposes. He also drilled a hole for me. He's the best. He did it twice for me. I won't say why b/c it was my fault.
We primed the wooden letters (that we found at Hobby Lobby quite by accident), the board, and four wooden cabinet knobs that we used as feet on the back b/c the clock mechanism stands away from the board. We spray painted all the wooden parts a glossy black.


We spray painted the clock hands the Raspberry color. I'm not sure they stand out enough, so we might have to repaint them a glossy black, too.
Then we modpodged the four papers to the board. We used wood glue to glue the wooden letters in their places so we could get the words placed correctly around them. We modpodged the words after that.


Glue is still wet.

Just trying to get an idea for the placement. These words go on the top squares.
We sealed all the words with a final coat of modpodge. After that was all done, all that was left was the feather boa and the clock hands and mechanism. We used Fabritac to adhere the feather boa around the clock. Lemme tell ya! Gluing a feather boa to something ain't easy! Sheesh. I hope I never have to do that again! We also used a staple gun on in. The clock hands and mechanism were easy. We used wood glue for the cabinet knobs/feet thingies (of which I do not have a picture).
It's pretty big. The board is 18" x 18", and the boa adds a few inches to either side. I think it's adorable, though!
I'm going to make myself one using the first board my dad cut for me. But much different. And without the boa.
Subscribe to:
Posts (Atom)